Cortical Screws are small components with a demanding job: they must engage the dense outer layer of bone and support the intended fixation. Choosing one in 2026 means looking beyond diameter and length. Bone quality, fracture pattern, plate design, insertion technique, and the patient’s clinical needs all matter. A screw that looks suitable on a tray may not be suitable for a particular construct.
As a practical guiding principle, this article uses the line, “Match the screw to the bone, the construct, and the clinical goal.” This is an editorial summary, not a quotation attributed to a named specialist. No source articles or verified expert quotation were provided, so assigning those words to a real clinician would be misleading. Sound selection should instead draw on current clinical guidance, device instructions, and the treating team’s judgment.
The sections ahead examine screw diameter, length, thread design, material, and compatibility with fixation systems. They also consider imaging, insertion accuracy, and common selection trade-offs. A millimeter can matter. So can the quality of the bone beneath the surface. This overview is educational, not a substitute for professional training or patient-specific medical judgment. One point deserves reflection: device specifications cannot, on their own, tell the whole clinical story.
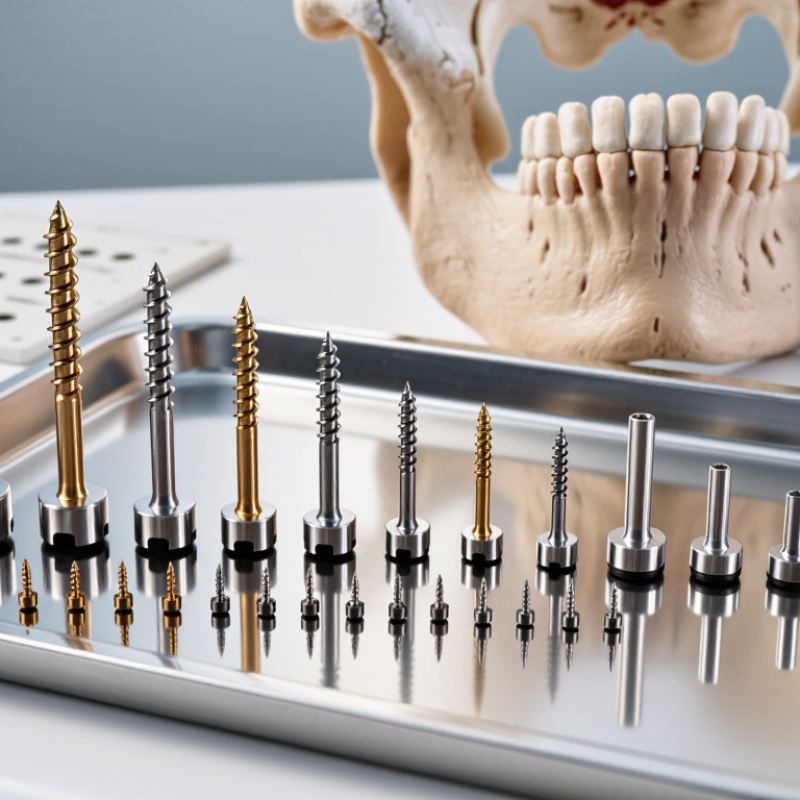
Cortical screws are designed to engage dense outer bone, called cortical bone. Their threads are usually finer, with a smaller pitch than cancellous screws. This design supports purchase along the shaft of long bones.
In contrast, cancellous screws use deeper, wider threads for softer, more porous bone. Cortical screws are not simply “stronger.” Their performance depends on bone density, diameter, length, and insertion accuracy.
The Global Burden of Disease 2019 Fracture Collaborators reported 178 million new fractures worldwide in 2019. The same analysis identified 455 million people living with fracture-related conditions.
The International Osteoporosis Foundation also estimates that one in three women and one in five men over 50 will experience an osteoporotic fracture. These figures matter during screw selection. Poor bone quality can reduce thread purchase, even when the screw appears correctly placed.
A locking screw differs because its head locks into a plate, creating a fixed-angle construct. A standard cortical screw relies more directly on compression and thread-bone contact.
A cannulated screw contains a central channel for guidewire placement; cannulation does not automatically define its thread pattern. In the operating room, surgeons should confirm the fracture pattern, cortical thickness, imaging, and planned trajectory.
The “best” screw is not always the longest one. That shortcut can fail. Even experienced teams must reassess fit after drilling, because small changes in alignment can alter fixation quality.
How to Choose Cortical Screws in 2026?
Matching screw diameter and length to bone anatomy is more important than choosing the newest instrument. Cortical screws usually engage dense outer bone, so diameter affects purchase, stiffness, and fracture risk. A larger screw may improve fixation in thick cortical bone, but it can weaken a narrow cortex. AO Surgery Reference recommends selecting the smallest diameter that provides reliable purchase and fits the planned trajectory. Measure the available bone on imaging, not by visual estimation. Digital planning helps, but it does not replace surgical judgment.
Length must allow adequate bicortical or monocortical engagement, depending on the procedure. The screw should cross the intended fragment without excessive prominence. In the forearm, a few extra millimeters can irritate tendons or soft tissue. In thin metaphyseal bone, excessive length may threaten nearby vessels or joints. The FDA’s orthopedic device guidance stresses correct sizing, placement, and compatibility with the fixation construct. Published biomechanical studies also show that pullout strength depends on bone density, thread engagement, and insertion technique, not diameter alone. Real cases are less tidy.
Tips: Check the narrowest cortex first. Confirm length on two imaging views. Match the screw to the fracture pattern, not habit. Leave room for compression when needed. I still pause when bone quality looks uneven; a smaller screw with better positioning may outperform a larger one. Record the measurement and reassess after drilling. Precision is practical, but never absolute.
| Bone or Procedure Context | Common Nominal Screw Diameter | Illustrative Length Range | Matching Considerations |
|---|---|---|---|
| Phalanges and other small bone fragments | 2.0 mm | Approximately 6–30 mm | Used in selected small-bone fixation systems. Match the screw to the fragment size, available bone stock, and the implant system; avoid placing a screw so long that it protrudes into a joint or adjacent tissue. |
| Metacarpals, metatarsals, and small-fragment fixation | 2.4 mm | Approximately 6–50 mm | Consider the bone’s dimensions and the intended fixation construct. A smaller diameter may be appropriate where bone size limits screw choice, but adequate purchase and the system’s approved indications must be confirmed. |
| Small-fragment fixation and selected periarticular or long-bone applications | 2.7 mm | Approximately 8–60 mm | Commonly selected within compatible small-fragment systems. Check the planned trajectory, local bone thickness, plate-hole compatibility, and proximity to the joint surface. |
| Adult long-bone shaft fixation with a compatible plate system | 3.5 mm | Approximately 10–80 mm | A widely used small-fragment cortical screw size. Choose length from the measured bone path and intended construct; confirm that the selected screw matches the plate and the bone’s available cortical purchase. |
| Larger adult long-bone fixation with a compatible large-fragment system | 4.5 mm | Approximately 14–100 mm | Used in selected larger-bone constructs. Account for bone dimensions, plate compatibility, fracture pattern, and the risk of the tip extending beyond the far cortex or into nearby structures. |
| How to estimate length: Measure the intended screw path with an appropriate depth gauge after preparing the hole. Select a length that achieves the planned cortical purchase without unwanted protrusion. Screw-length conventions and available increments can vary by implant system. | |||
| Important: The ranges above are illustrative examples of commonly available sizes, not patient-specific recommendations or a substitute for the implant system’s instructions for use. Final diameter, length, trajectory, and technique should be determined by a qualified clinician using the patient’s anatomy, imaging, procedure, and compatible instrumentation. | |||
How to Choose Cortical Screws in 2026?
Thread design and material often decide whether fixation feels secure or merely looks secure. Cortical screws use finer threads and smaller pitch than cancellous screws. More threads can increase bone purchase along a dense cortex. However, excessive thread engagement may raise insertion torque and damage the pilot hole. ASTM F543 identifies insertion torque, torsional strength, and pullout testing as key mechanical evaluations. A 2023 systematic review in Injury also linked higher thread engagement with improved fixation, but warned that bone density changes the result. The patient matters more than the catalog.
Material changes stiffness, handling, and imaging behavior. Stainless steel has an elastic modulus near 190 GPa, while titanium alloys are near 110 GPa, according to ASM Handbook data. The lower stiffness of titanium may reduce the mismatch with bone, but it does not guarantee better healing. Titanium can also complicate removal after cold welding. ISO 5832-3 and ISO 5832-1 specify composition and mechanical requirements for common implant alloys. Use certified material data, not marketing language.
I would check the thread profile under magnification. Tiny details matter. A sharp, consistent cutting flute can reduce insertion resistance. A blunt tip may wander in hard cortex. Yet bench data cannot reproduce every patient. This is where judgment becomes imperfect. The 2024 FDA guidance on orthopedic implants emphasizes validated testing, biocompatibility, and fatigue performance. In 2026, choose the screw that matches bone quality, load direction, and surgical technique—not simply the strongest alloy.
How to Choose Cortical Screws in 2026?
Implant compatibility begins with the bone, not the package label. Confirm cortical thickness, fracture pattern, screw diameter, thread length, and available purchase depth. Check whether the screw matches the plate’s hole geometry, thread profile, and locking mechanism. A similar-looking screw may still cause poor seating or unwanted motion. The WHO Global Patient Safety Report 2024 estimates that one in ten patients experiences harm during healthcare, with over half considered preventable. Compatibility checks deserve that level of attention.
Review the implant’s instructions for use, sterilization limits, imaging conditions, and required instruments. Confirm the driver type, torque range, drill size, depth gauge, and extraction tools before surgery. ASTM F543 provides standardized testing methods for metallic bone screws, but laboratory performance does not replace clinical judgment. A practical check is a sterile-tray rehearsal: place the screw, driver, guide, and plate together. If one item feels uncertain, stop and verify it. Small omissions can become difficult intraoperative problems.
Tips: Record screw diameter, length, material, and lot information. Match the implant with the approved instrument set. Ask whether mixed materials could create corrosion concerns. Recheck the patient’s imaging and bone quality. A checklist helps, but it is not flawless. Human review still matters. Consult the latest instructions for use and local surgical protocols before selection.
Nominal metric diameters commonly encountered in cortical screw systems and the key compatibility checks required before surgery.
The diameters shown are representative metric sizes used in orthopaedic fixation. Actual availability, thread design, instrumentation, and surgical indications vary by implant system and must be verified against the current instructions for use.
Cortical screw selection should begin with anatomy, not inventory. Review thin-slice CT scans for cortical thickness, pedicle width, fracture lines, and bone quality. Measure the planned diameter and length, then compare them with the surgical objective and fixation corridor. A 2023 International Osteoporosis Foundation report estimates that one in three women and one in five men over 50 will experience an osteoporotic fracture. That risk matters. Poor bone quality may require a different fixation strategy, not simply a longer screw.
Verify placement with calibrated imaging, navigation, or both. Confirm the entry point, trajectory, depth, and distance from neural or vascular structures. Intraoperative checking should include screw position before final tightening. The World Health Organization reports that about one in ten patients experiences harm during healthcare, with more than half considered preventable. That figure is not specific to spinal fixation, but it supports disciplined verification. Use the device instructions for torque, diameter, and compatibility. Document every measurement.
Small errors accumulate.
A practical review should involve the surgeon, radiology team, and operating-room staff. Their feedback may reveal a misleading landmark or an overlooked breach. I have found that visual confidence can be unreliable, especially when anatomy is distorted. Recheck questionable images. Do not treat navigation accuracy as absolute. Safety improves when technology, anatomical judgment, and documented review agree.
Sources: World Health Organization, Global Patient Safety Action Plan 2021–2030; International Osteoporosis Foundation, Osteoporosis and Fracture Epidemiology Report 2023.
Diameter affects bone purchase, stiffness, and fracture risk. A larger screw may help thick cortical bone. It can weaken a narrow cortex. Choose the smallest diameter providing reliable purchase.
Length should match the intended bone engagement. It may require bicortical or monocortical fixation. Avoid excessive prominence beyond the far cortex. A few extra millimeters can irritate nearby tendons.
Use thin-slice CT when anatomy is complex. Check cortical thickness, bone width, and fracture lines. Confirm length on two imaging views. Visual estimation alone is unreliable.
Yes. Low bone density may reduce thread purchase. A longer screw is not always the answer. Another fixation strategy may be more suitable. Bone quality can look uneven.
Check the entry point, trajectory, depth, and nearby structures. Calibrated imaging or navigation may assist verification. Confirm position before final tightening. Technology is helpful, not absolute.
Record diameter, length, measurements, trajectory, and final position. Confirm device compatibility and tightening requirements. Reassess after drilling. Small errors accumulate.
The surgeon, imaging team, and operating-room staff should review it together. They may identify a misleading landmark or hidden breach. Shared review is valuable. Confidence can still be wrong.
Do not select a screw from habit or inventory. Match it to the fracture pattern and bone corridor. Leave room for compression when needed. I still pause when measurements disagree.
Choosing Cortical Screws in 2026 requires a clear understanding of bone anatomy, surgical goals, and implant requirements. Unlike cancellous screws, Cortical Screws typically feature finer threads designed to achieve strong purchase in dense cortical bone. Selecting the correct diameter and length depends on the bone’s size, the fracture or fixation site, and the need to avoid penetration of nearby structures. The screw should provide stable engagement while preserving surrounding bone and soft tissue.
Thread profile, pitch, core design, and material can influence insertion, holding strength, fatigue resistance, and compatibility with the patient’s anatomy. Before use, surgeons should confirm that the screw matches the fixation system, instruments, imaging requirements, and procedural guidelines. Final verification should include accurate measurement, appropriate drilling and tapping, correct placement, and assessment of alignment and stability. A structured selection process helps support predictable fixation, reduce avoidable complications, and ensure that the implant is used safely within the intended surgical application.

Virelox